Lemon Arugula Capellini Recipe {Gluten-Free}

I first enjoyed this yummy lunch (or side for dinner) at a local grocery store deli here in my Arizona small town. As with all delicious recipes I’ve tried that I believe can be “made healthier,” I knew I wanted to duplicate it at home.

After a couple years of working to recreate it to FRESH Start Plan standards, I think I’ve done it. And it’s yummy, ya’ll - wait til you try this!

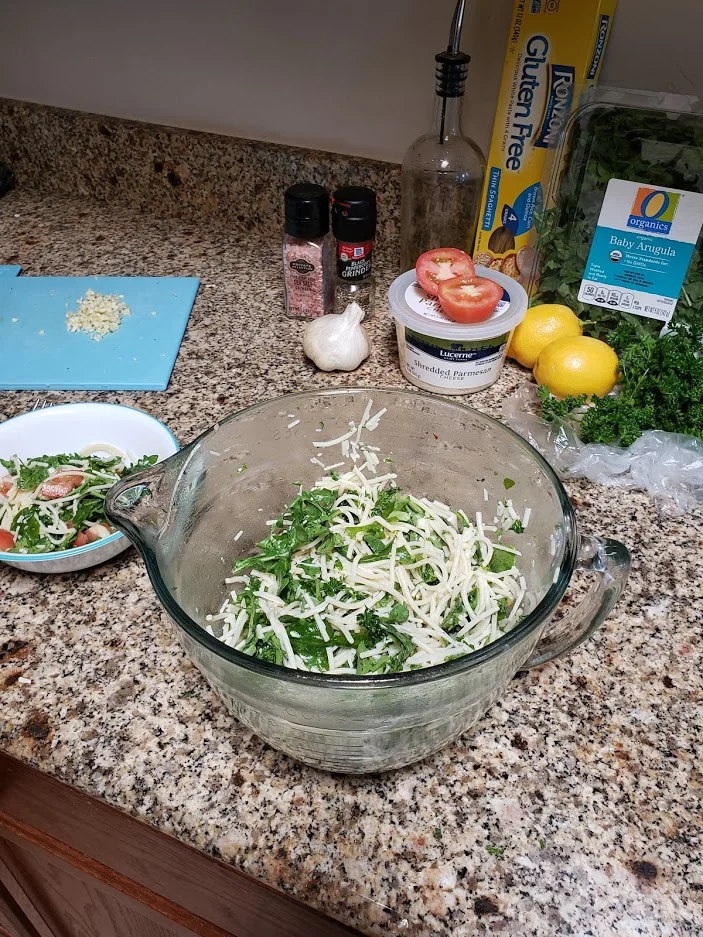
Here’s how to make the gluten-free version of Lemon Arugula Capellini!

Ingredients

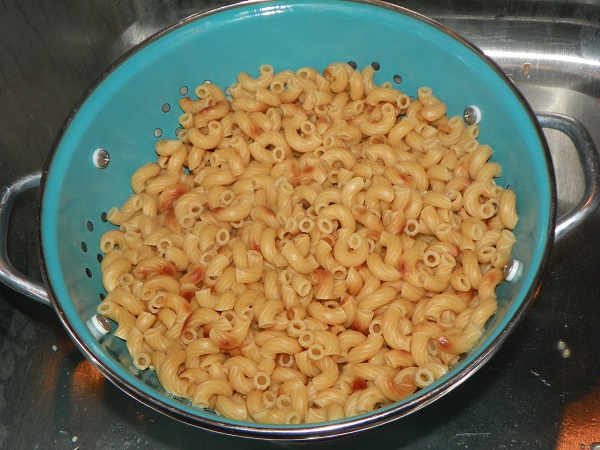
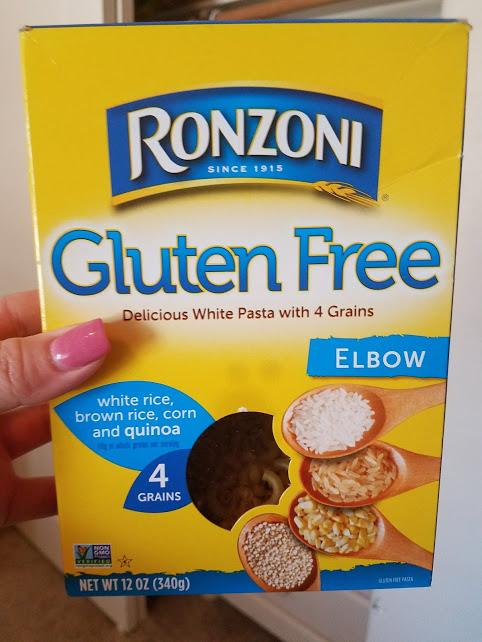
  • 1 box gluten-free pasta (try to get the skinniest spaghetti noodle you can find in gluten-free options - I use Ronzoni brand thin spaghetti because I can easily find it in my small town grocery store)

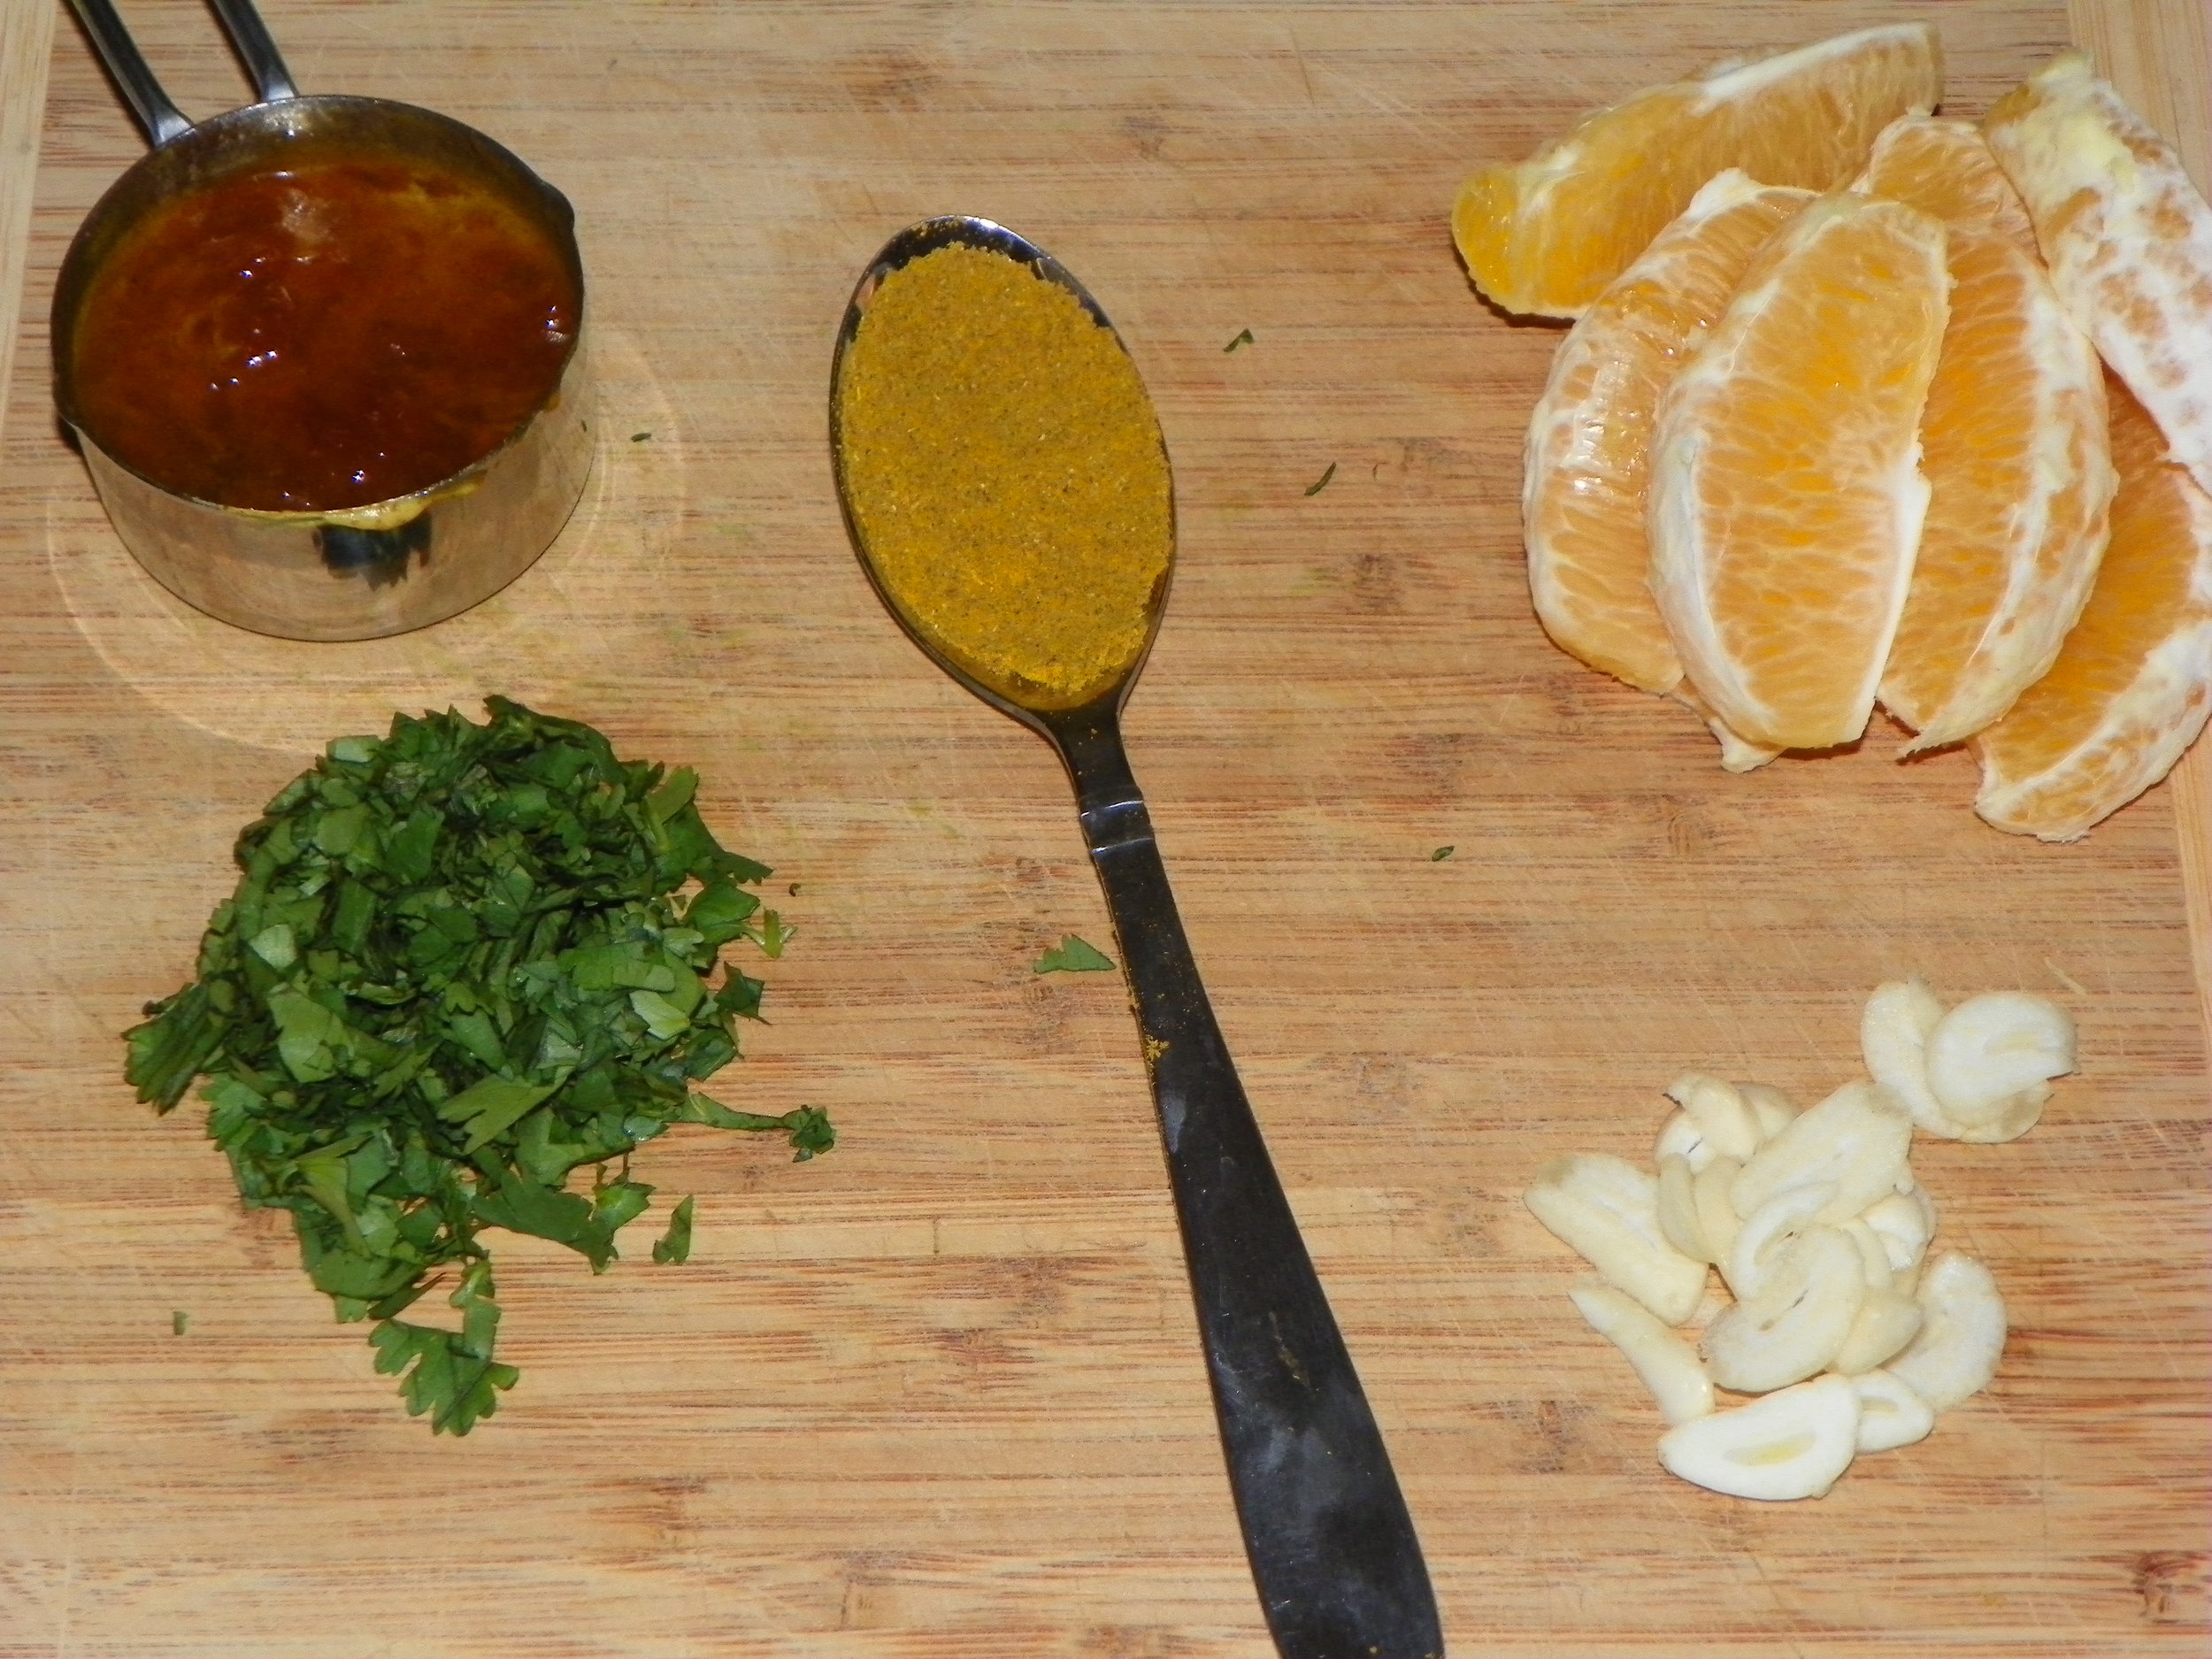
  • 2-3 FRESH lemons, squeezed and a small amount of the peel, grated

  • 3 FRESH garlic cloves, minced finely

  • 1/3 to 1/2 cup olive oil (or to taste)

  • 1/2 cup fresh grated parmesan cheese (eliminate for dairy-free version)

  • 2 Roma tomatoes, chopped (you can use any tomatoes you have on hand or pick up)

  • 2 handfuls fresh arugula (or to taste - it’s a strong flavored herb/green and some prefer less!)

  • 1/2 bunch ruffle parsley, roughly chopped

  • Sprinkle to taste: Salt (I use Himalayan Pink) FRESH Ground Pepper, and Red Pepper Flakes

Optional ingredient:
1-2 Tbsp Capers -
I’ve tried it both ways, since for some, capers can be hard to find or too expensive - and it’s truly just as good with out them. But they do add a FRESH salty, briny flavor if you can find them for a decent price!

Lemon Cappelini recipe pic 1.jpg

Instructions:

Put enough water to cover the pasta on to boil, once the water is boiling, carefully place the pasta into it. Cook until just barely done (al dente). Drain pasta in a strainer.

Meanwhile, drizzle olive oil into a pan and heat on medium to high. Once oil is hot, add the minced garlic cloves and toast for about 1-2 minutes, then remove pan from heat and set aside.

Pour the toasted oil and garlic mixture into a measuring bowl or cup big enough to make the “sauce” in. Add in the remaining olive oil, fresh squeezed lemon juice, grated lemon peel, chopped parsley and spices. Whisk briskly for a few seconds, until mixed well.

In a large mixing bowl (with lots of room to fully mix everything) place the pasta, arugula, tomato chunks and grated parmesan cheese. Pour the “sauce” over it and mix everything together well.

Lemon Cappelini recipe pic 3.jpg

It’s ready to serve! (Or, if you make this early and allow it to set in the fridge for an hour or two, it tastes even better - as everything will have time to absorb the flavor of the sauce.)

Once you’ve tried this at home, let me know what you think - I was so thrilled to be able to make this gluten-free as I continue to heal the autoimmune I’m dealing with. I’m excited to add this dish to our gluten-free selections here at FRESH Start for any of you who have discovered you need to avoid gluten to heal and feel better.

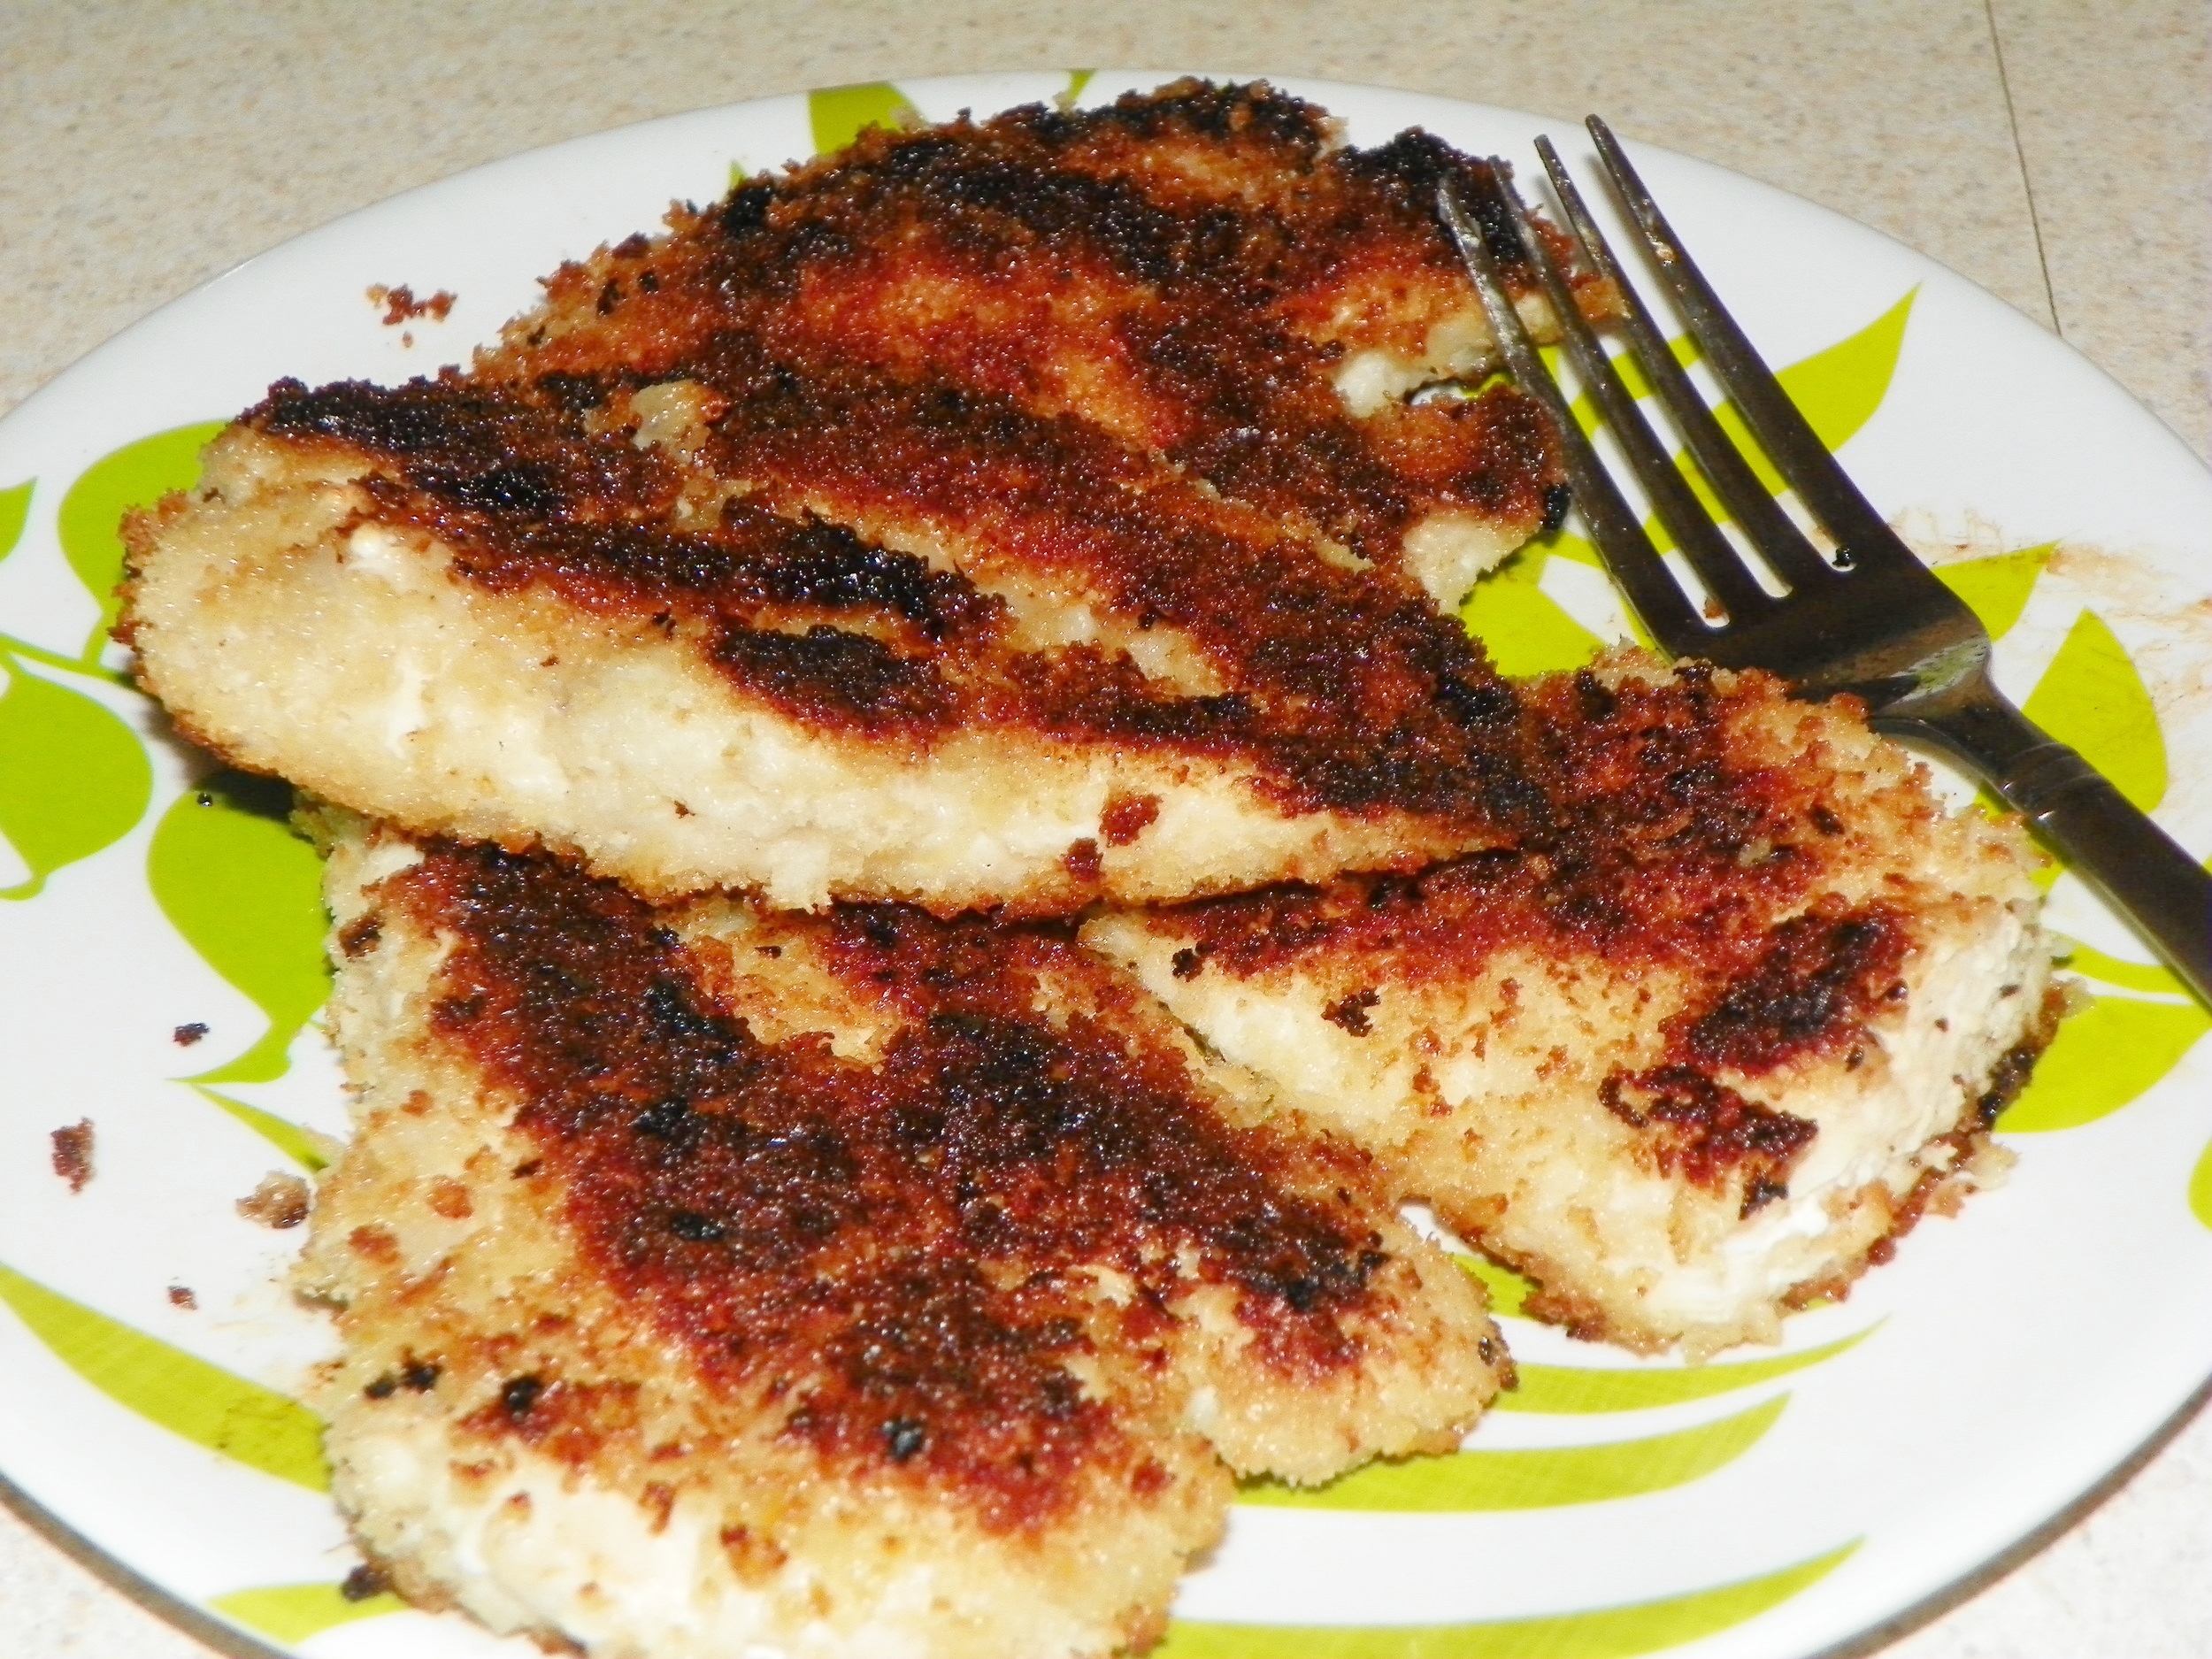
Perfect for a side dish served with fish or grilled chicken, or toss this salad with cooked shrimp for a main dish. You can also bring and share it as a tasty side at a bar-b-que!

Would you like to add more Healthy Habits into your daily routine (and do it with friends?)

JOIN US in our {free} #52weeksofhealthyhabits Experience we’re currently doing!

We’d love to have you! Check out all the goodies you get for joining us there RIGHT HERE!

Grill Your Veggies for Healthy Benefits + Recipes

One of the reasons I love grilling is because of how deliciously easy it is to put healthy food on your family’s table.

You might be surprised to learn how many foods you can grill! Combining different food groups to take them to a whole new level of tastiness - fruit with veggies, veggies with fish, citrus with fish, chicken with fruit, the list goes on.

I’ve even seen grilled salad in some recipes! One of my favorite things - and one of the healthiest foods to grill - is vegetables.

The benefits to your diet from eating more veggies is endless, so why not enjoy them grilled?

  1. Gets More Nutrients into Your Body Where They Belong – Grilling vegetables cooks away less of the vitamins & nutrients in them than other cooking methods, like boiling. Next to eating them FRESH, “grilled” is one of the best ways to eat veggies.

  2. Naturally Adds Flavor – The heat of the grill causes the natural sugars in vegetables to caramelize, which gives the same veggies an entirely different flavor than when eaten fresh, steamed or boiled.

  3. Variety – You can easily mix veggies with each other, or with your favorite lean meats, seafood, and even fruits. The possibilities are endless.

  4. Picky Eaters Eat More Vegetables – Grilled veggies taste different and can be easily seasoned with herbs and spices to make their taste more appealing to even the finickiest eater. This may be a major way your picky eater will add more veggies into their diet.

  5. It’s Fun! – Grilling gets you outside for some fresh air and Vitamin D! Whether dinner with the family or a get-together with friends, grilling has a way of getting us outside where we enjoy the fresh air! Who couldn’t use more of that?

Enjoy more veggies at your house with these easy, delicious recipe ideas:

Spicy-Mexican-Grilled-Sweet-Corncobs-300x185.jpg

Spicy Mexican Grilled Sweet Corncobs

Ingredients

  • 5-6 FRESH ears of sweet corn

  • 2 Tbsp butter

  • 2 Tbsp olive oil

  • 1 tsp chili powder

  • 1/2 tsp red pepper flakes

  • 1/2 tsp cumin

  • 1/3 cup feta cheese (or Cotija Queso)

Instructions

Preheat grill to medium heat. 

Boil ears (shucked and cleaned) in a stock pot for about 20 minutes, then drain and remove. 

Place corn ears over grill and drizzle olive oil over them, then cook for 5 minutes on one side. Using tongs, turn ears over to cook for 5 minutes on other side.

Place corn on a platter, and sprinkle with the spices, and place a pat of butter on each ear. Then sprinkle a few crumbles of cheese over corn and serve.

Lemon & garlic asparagus.jpg

Lemon & Garlic Asparagus

Ingredients

  • 1 bunch thin asparagus

  • 1 bunch of green onions, trimmed

  • 2 cloves fresh garlic, minced

  • 1 lemon, halved

  • Olive oil

Instructions

Preheat grill on low-to-medium heat, and prepare a cookie sheet-sized, folded “pan” made from the aluminum foil. 

Rinse the bunch of asparagus off, trimming off at least an inch from the bottom of stalks. Place the spears on the aluminum foil, spreading them out in an even layer. Add the bunch of green onions, spreading them through the asparagus stalks. 

Sprinkle the minced garlic over the stalks, and squeeze the juice from the two lemon halves over the vegetables. 

Drizzle olive oil generously over the vegetables, and place homemade “pan” over the grill slats. Grill for about 10-15 minutes (to desired done-ness) over low to medium heat.  Serve immediately.

Get creative, research fun recipe combinations, and remember there is no limit for what you can cook on the grill!

How to Make Greens 3 Easy Ways

Greens are one of the easiest side dishes you can make for dinner or even easily thrown in with another meal, like with eggs at breakfast.

Today, I’m sharing with you How to Make Greens 3 Easy Ways…

First, let’s clarify what I mean in this post by greens, because obviously there are unlimited varieties of edible greens available! (Lettuce, spinach, cabbage, bok choy, arugula, dandelion greens, and much, much more!)

Here though, I’m focusing in on 3 of the more common greens so that you can be sure to find them locally and affordably:

Mustard Greens
Collard Greens
Kale Greens

greens.jpg

How to Make Mustard Greens

Ingredients

1 bag of pre-chopped greens from store OR 1-2 fresh heads of mustard greens, washed and chopped
Sprinkle Salt
1/2 sweet onion, finely diced
3 garlic cloves, finely minced
1 Tbsp Apple Cider Vinegar
Small amount real bacon bits in bag from store (or cook 3 slices of bacon well, then crumble into bits)
Drizzle olive oil

Instructions

In a medium-sized pot, boil the greens and a sprinkle of salt over high heat for 3 minutes, then drain thoroughly. Put the greens in a strainer, and press them into the strainer with a wooden spoon, to squeeze out any remaining water from the cooked greens.

Meanwhile, saute the sweet onion and garlic in olive oil for 3-5 minutes or so in a pan over medium heat.

Add in the greens and saute for 2 mins on high heat. Once they are finished, drizzle 1 Tbsp apple cider vinegar over the greens and add the bacon bits. Serve immediately.

This is a 10 minute dish, top to bottom - easy to make, affordable to buy the ingredients. And family-friendly - it’s one of my daughters’ favorite side dish!

Here’s the next one:

How to Make Collard Greens

Ingredients

1-2 head of Collard Greens, washed and chopped in thin ribbons (or a full bag of pre-chopped collards from the store)
Olive Oil
3 cloves garlic, minced
1/2 sweet onion, diced
half fresh lemon, squeezed over the greens
Salt & Pepper

greens-made-easy.jpg

Instructions

Heat a large pan on the stove over medium heat and drizzle the olive oil into it once it’s hot. Add the onions and saute them for about 5 minutes. Then add the minced garlic and saute another 2 minutes.

Add in the ribbon-sliced greens (or bag of store-bought) and cook for about 3-4 minutes, or until the greens look jewel-toned.

Squeeze the fresh lemon juice over the greens and stir. Remove from heat and serve immediately.

Under 10 minutes, easy to prepare, and SO delicious, you will want them again and again!


For the 3rd idea and the recipe on how to make easy-peasy Kale Chips, go HERE!


Tell me, do you think these recipes will help you get more green veggies into your eating plan?

Try one or all 3 of ‘em, and then comment below with your results! I’m telling you, you’ll be hooked once you try them!

Beef and Poblano Rice One-Pot Dinner

Wait til you try this simple, delicious, whole-family-loves-it dinner recipe - you’re going to thank me! Ha! I discovered this 30-minute treasure while “trying out” a dinner-in-a-box service that was the best one I’ve tried yet. (But I just find I can’t continue those services due to my incessant need to re-invent every recipe I try!)

So here is the Coach Bess - re-invented version of this one-pot dinner that the whole family loves!

beef and poblano.jpg

How to Make Beef and Poblano Rice

Ingredients

2 poblano peppers
1 lb lean ground beef (90/10 and grass fed, preferably)
1 1/2 cups basmati rice (can use brown basmati - will just be a different texture)
2 1/2 cups water (or beef broth if you want more flavor)
1 Tbsp seasoning (I used hamburger seasoning mix that has chili powder, garlic and onion powder in it)
1/3 cup sour cream
2-3 green onions, diced finely
olive or avocado oil
kosher salt, black pepper

Instructions

Preheat the oven to 425 degrees and make sure the rack is centered in the oven. Have a large dutch oven or cast iron pan ready to use, because you will first prepare this dish on stove top, then put the pan directly into the oven to finish it.

Halve the poblanos, remove seeds and ribs, and dice into 1/2 inch squares or so. Heat 2 Tbsp avocado or olive oil over medium-high heat in the pan. Add in the poblano pieces, and let them saute, stirring only a couple times, for about 5 minutes or until tender.

Add in the ground beef and cook for 5 minutes or so, or until fully browned. Scrape to the side of the pan.

Add the dry rice and the Tbsp spice, and “toast” it over the heat for about 2 minutes, only stirring once or twice. Stir together with the ground beef and peppers mixture and toast for another minute.

Stir in the water or broth, and bring the entire mixture to a quick boil over high heat. Once boiling, carefully remove from stove top heat and place entire pan of mixture into the pre-heated oven. Place lid on it, and bake for about 17 minutes, or until all the water or broth is absorbed.

While the rice dish is baking, stir together a couple tablespoons of water with the sour cream, making it slightly runny for easy drizzling. Season with salt and pepper.

Once the rice is done, remove from oven and serve within minutes and after fluffing the rice with a fork. Drizzle the sour cream and sprinkle the green onions over it. Mmmmm!

BONUS TIP: for added nutritional goodness, slice up a fresh avocado, salt them, and serve alongside or over dish.

What do YOU think?

Easy enough to try out? I personally love the easy cleanup and simple process of this one-pot recipe!

How to Cook a Spaghetti Squash in the Oven

Naturally sweet and crunchy, spaghetti squash makes a great substitute for the pasta in spaghetti, served with chicken Parmesan or just by itself with a pat of butter melting over it.  It is light, pleasant and nutritious, with many health benefits.  

High in vitamin C, potassium, calcium and magnesium, squash has only 40 calories and 4 grams of sugar in a FULL one cup serving. Packing a punch in the omega-3’s and omega 6’s as well, this underrated natural beauty is a must-eat for health!

Here are the simple steps to cooking a spaghetti squash in your own oven:

coooking spag squash pic 1.jpg

Step 1:  Preheat the oven to 400 degrees. Slice the squash (carefully – the outer shell is hard!) in two pieces, lengthwise.

cooking spag squash pic 2.jpg
cooking spag squash pic 3.jpg

Step 2:  Using a spoon, scrape out all the seeds and pulp in the soft interior of the squash.

Step 3:  Place the two sides face up (or down, it doesn’t really matter) in 1 inch of water in a large baking pan.  Cover the pan and bake for 45 minutes to an hour, or until squash is tender and soft.

 
how to bake a spaghetti squash pic 5.png
 

Step 4:  Once slightly cooled, take a fork, and peel the squash strands, just like spaghetti, off the rinds and into a bowl.  Serve and enjoy!

At our house, we love our spaghetti squash with this healthy homemade spaghetti sauce recipe. The two put together pack a nutritional punch that offers a filling and comforting meal everyone enjoys!

Here’s a how-to video on how to do it:

Was this how-to helpful? Would you like to see more?

Our FRESH Start Club members get helpful how-tos just like this every single month, sometimes even before they're posted here on the blog. Plus new recipes, videos, printables and a warm & friendly support group. If you're ready to find support in your own quest for a healthy lifestyle, GO HERE to learn how you can join us! {Oh and it's FREE!}

Here are some other delicious recipes we think you might enjoy:

How to Make Healthy Turkey Mini-Meatloaves

How to Bake Acorn Squash Rings

Grilling Chicken & Salmon

Egg Frittata Muffin Breakfast Recipe

No other breakfast says “get up and go” like eggs! Providing an unmatched protein value (6 grams of protein in just one) eggs are a great choice for a healthy breakfast.

Whether you’re looking for a wholesome, energy boosting breakfast to send the kids off to school with or a healthy start to the weekend for the whole family, here’s a recipe that will keep them going strong through the entire morning.

pic 1 for Mini Egg Frittata Breakfast Recipe.jpg

Here’s how to make Egg Frittata Muffins

Ingredients

  • 1/3 cup finely chopped sweet or green onion

  • 2/3 cup chopped low-sodium ham

  • 1/3 cup shredded cheese

  • 4 large egg whites

  • 2 large eggs

  • optional: 2 Tbsp diced chives

Instructions

  1. Preheat oven to 350 degrees.

  2. Heat a large nonstick skillet coated with cooking spray over medium-high heat.

  3. Add onion and sauté 2 minutes or until crisp-tender. Add ham, sauté for 3 minutes. Remove from heat, cool mixture for 5 minutes.

  4. Meanwhile, combine remaining ingredients in a large bowl, stir with a whisk.

  5. Add ham mixture, stirring with a whisk.

  6. Spoon mixture into a 12-cup regular size OR 24-miniature muffin cup pan coated with cooking spray.

  7. Bake for 20 minutes or until fully cooked.

Meal Prep Tip: These can be cooked ahead of time in big batches and frozen for quick-reheat on a later day.

Starting your morning with a breakfast high in protein, like this one, can make a huge difference in the rest of your day, giving you lasting energy.

Here are 5 reasons to include the protein powerhouse in your breakfast dishes.

Benefits of Eggs

  • Keeps you feeling full longer

  • Helps you stay energized

  • Builds muscle strength

  • Repairs muscle tissue

  • Prevents muscle loss in older adults

They don’t call it the incredible, edible egg for nothing! ;)

Baked Maple Acorn Squash Rings

This is an easy-to-make side dish for any time of year, but right now, during the holidays…it’s especially filling and comforting!

I’ve made Acorn Squash as a side dish for my hubby in the past, but just by simply halving the squash and digging out the seeds. Then adding (too much) butter and brown sugar before baking for an hour…so I wanted to find a recipe that is healthier and frankly, easier! This is it!

After reading that boiling or steaming squash actually lessens the vitamin and mineral load, I determined to make it only by baking or broiling in the oven to preserve the wonderful amount of Vitamin A, C & B-6 as well as folate, niacin, potassium, magnesium found in it!

Oh and did ya know that just a 1/2 cup serving (that’s only about 1-2 rings!) is almost 20% of your daily fiber needs? This is such a tasty way to knock out your fiber quota!

Another cool fact - when we combine fibrous vegetables like squash, potatoes (especially sweet!) and a healthy fat like olive oil and then cook them together, it’s actually proven to help the body break down and digest the nutrients more effectively! Super cool, right? Cuz of course it tastes better this way, too!

Here’s How to Make Baked Maple Acorn Squash Rings

acorn squash 3.jpg
 

Ingredients

acorn-squash-938936_640.jpg
  • One medium Acorn Squash (here’s a pic of the whole squash so you can see which one it is!)

  • 2 Tablespoons Olive Oil

  • 2 Tablespoons Pure Maple Syrup

  • Grind or two of Cracked Black Pepper

  • Grind or two of Himalayan Salt


Instructions

  1. Preheat oven to 425 degrees. Place a sheet of aluminum foil over a cookie pan.

  2. Slice the Acorn Squash in 1/2 inch or so thickness, then using a paring knife (or just your fingers) clean off the strings and seeds from the middle. (You can also use a round cookie cutter if that’s easier!)

  3. You should get about 6 slices from a small, 8 from a medium or even up to 10 from a large squash!

  4. Lay the slices on the cookie sheet, then drizzle the oil and maple syrup over each slice. Lightly crack the pepper and grind the salt over each slice.

  5. Pop in the oven for about 25-30 minutes or until nicely done to taste (they should caramelize and brown a bit!)

acorn squash 2.jpg

OK now it’s your turn to try it and tell us what you think!

Can’t wait for you to bake a batch of these for your loves, then come back and tell us how they turned out! Comment below with your experience!

Healthy Sweet Potato Pie Recipe

There is something about the holidays that Causes us to crave familiar, homey sweet treats.

Sugar loaded cakes, cookies, fudge and pies are just a few of the not-so-healthy choices that can and many times do, put a halt to all the hard work families have put into creating a healthier lifestyle.

Enjoying tasty holiday treats doesn't have to stop completely when you're taking the steps to get your family healthy. Instead of feeling guilty for enjoying holiday goodies or forgoing them altogether and feeling like a scrooge, try the following:

  1. Choose healthier, replacement ingredients to include in your desserts.

  2. Reduce the amount of sugar you use in your recipes.

  3. Limit your portions.

These are just 3 strategies you can use any time of year, but especially during the holidays, to keep your healthy lifestyle from derailing! Here are just a few reasons this sweet potato pie is a family favorite in our house!

  • Sweet potatoes are truly a SUPERFOOD! Vitamin-packed, they have a reputation for boosting the immune system, which of course is especially helpful this time of year!

  • The benefits of eating less sugar are almost too numerous to list, but some of the top reasons are: weight loss, better heart health, and strong teeth. This recipe uses much less sugar and even that can be easily replaced.

  • It doesn't take a big helping of this pie to satisfy the taste buds of even the sweetest tooth! So healthy portions can be maintained!

Healthy Sweet Potato Pie Recipe

How To Make It:

Ingredients:

  • 2 cups sweet potatoes, mashed

  • 1/4 pound (1 stick) butter or ghee, softened

  • 2 eggs, separated

  • 1/2 cup brown sugar, packed

  • 1/4 teaspoon salt (or, a sprinkle!)

  • 1/2 teaspoon ginger

  • 1/2 teaspoon cinnamon

  • 1/2 teaspoon nutmeg

  • 1/2 cup evaporated milk

  • 1/4 cup white sugar

  • 1 (9 inch) unbaked pie crust

Instructions:

  1. Heat oven to 400 degrees. Place pie crust in pie pan. In a medium sized mixing bowl, combine sweet potatoes, butter, egg yolks, brown sugar, salt, ginger, cinnamon, nutmeg and evaporated milk and mix together.

  2. In another bowl, beat egg whites on high until stiff peaks form, then add the sugar. (Hint: Use a metal bowl and freeze it for 10 minutes first - the peaks will form quicker!) Gently fold egg whites into the first mixture with the sweet potatoes.

  3. Pour batter into unbaked pie crust and bake at 400 degrees for 10 minutes. Reduce oven temperature to 350 and bake until firm (approximately 30 minutes).

Go ahead, try this healthy Sweet Potato Pie this year and see what ya’ll think!

By making better choices for your holiday desserts, limiting sugar and sampling foods in moderation, your family can enjoy the delicacies of this festive season with little sacrifice and no guilt! 

Ahi Tuna Poke Bowl {FRESH Start Style!}

So per the usual, I was a little behind the healthy-times and it took me til this year to try a poke bowl!

Yes, I know, they’ve been the rage for a lot longer than that…but alas, it is what it is! Now that I’ve tried one and loved it (and coerced happy-hubby recipe-taster into loving it too!) it’s fast becoming a regular around here. Now to get the kids to love it…they’ll eat it if I serve a bit of grilled chicken in place of the tuna for them…still a fast and easy family dinner!

What I love about this dish is that it’s NO-cook - the kitchen and YOU stay cool while you make a filling, healthy, FRESH dinner dish! And hubby loves to take the leftovers the next day for work.

ahi tuna poke bowl

Ingredients

SAUCE:

  • 1/4 cup soy sauce

  • 1 Tbsp rice vinegar

  • 2 teaspoons sesame oil 

  • good shake of crushed red pepper flakes

  • 3 green onions, thinly sliced

  • good shake of sesame seeds, plus more for garnish

BOWL:

  • 1-2 ahi tuna steaks (palm-sized) - depending on how many people you’re feeding - use one steak for each person

  • cooked brown rice

  • fresh spring greens or romaine or spinach

  • fresh cucumber, sliced

  • sugar peas, sliced thin (diagonally)

  • shredded carrots

  • avocado

Here’s how to make it:

Step 1: Mix up all the sauce ingredients to use as marinade for tuna.

ahi tuna poke bowl marinade ingredients
tuna marinade .JPG

Step 2: Dice up the tuna into 1 inch chunks. Marinate in sauce for about 15-30 minutes.

tuna steak.JPG
tuna marinaded 1.JPG

Step 3: While the tuna is marinating, chop and dice the rest of the fresh ingredients and begin plating (time-saving tip: I buy pre-packaged greens and pre-shredded carrots to save even more effort on this dish!)

ahi tuna poke bowl chopping ingredients

Step 4: Once everything is chopped, spoon some rice into the bowl, lay some greens around it, then place the tuna and desired toppings over the bed of rice and greens.

I usually just lay out the ingredients buffet-style, and let everyone make their own bowl to their liking of amount and what’s in it…then they can drizzle more sauce over it!

ahi tuna poke bowl ingredients buffet style

I can’t wait for you to try this super-easy dish and then let us know if you are a converted poke bowl lover as well! Post a comment right here and tell us what you think of this fresh and easy dish!

tuna bowl 4.JPG

Healthy Cereal Cookies {Gluten-Free!}

Who doesn't love a FRESH new healthy cookie recipe, especially when it's actually got nutrition in it? My kids were so happy when I tested this recipe this past weekend (it's 100% my invention by the way!) and we were all happy when they actually turned out!

Now that gluten is a nemesis to my body's healing from an autoimmune disorder, I avoid it as much as I can...but that doesn't mean I love all things gluten-free - I can't stand how dense many things turn out with a lot of gluten free flours out there.

So this recipe uses a $5 gluten free flour from my neighborhood grocery, nothing too fancy. I bake so rarely now, it's worth the splurge! Try it and see what I mean. No rock-hard recipe here!

Ingredients

ingredients pic healthy cookies.jpg
  • 1 cup gluten-free flour

  • 1/2 cup ground flaxseed

  • 1 tsp baking soda

  • 1 tsp baking powder

  • 1/2 tsp salt

  • 1 tsp ground cinnamon

  • 1 stick butter, softened

  • 1/3 cup coconut oil

  • 1/3 cup white sugar

  • 1/3 cup brown sugar (or 2/3 cup brown sugar and no white)

  • 1/4 cup maple syrup

  • 2 eggs (we use cage-free, grain-fed)

  • 1 tsp pure vanilla extract

  • 4 scoops fruit and veggies powder (like the one pictured)

  • 2 cups bran cereal (fun sub: fruit n yogurt bran cereal!)

Instructions

prep for healthy cookies.jpg
  1. Pre-heat oven to 350 degrees. Place parchment paper on 2 cookie pans.

  2. Combine the dry ingredients (first 6 ingredients listed!) and stir together, then set aside.

  3. Mash the butter, coconut oil, and sugars and syrup together by hand, or use a handheld mixer for ease. Set this bowl aside.

  4. Whip the 2 eggs, adding in the vanilla extract. Add into the bowl with the sugars, butter and oil and stir all wet ingredients together well.

  5. On low speed with the hand mixer (or by hand) slowly add in the dry mixture to the wet ingredients bowl, a little at a time.

  6. Then slowly, add in the fruit and veggie powder and bran flakes until fully mixed.

  7. Drop a Tablespoon of dough on the trays, about 1.5 inches apart to allow for rising.

  8. Bake on 350 degrees for about 10 minutes, check the cookies, if they are browning on edges, they are done! Remove them from oven and let them sit on hot cookie pan for about 2-3 minutes.

  9. Move them to a cookie rack to finish cooling.

  10. Ready to enjoy! You can freeze extras for quick grab snacks for kid's lunches, after-school snack or part of an easy breakfast by serving them with a smoothie or banana!

cookies on rack 3.jpg

If you like, you can always add in nuts, dried fruit or mini-chocolate chips for extra fun or texture. You could also replace the coconut oil with peanut butter, and add in 1/2 cup mini chocolate chips to have a PB and choco snack!

These "cookies" contain enough healthy nutrients to be considered equal to a granola bar! Delicious, nutritious snacks! (This recipe is full of protein, fiber, omega 3 fatty acids, vitamins and minerals...mmmm!)

After you try them, pop back over here and tell us what you think!

Bet your kids/family won't even know they are eating such a great blend of nutrition!

Mango & Chicken Napa Salad

Light dinner-making just got easier than ever, with this toss-and-go Mango and Chicken Napa Salad recipe! Your family will enjoy this one-bowl meal that is packed with fiber, lean protein, and delicious healthy fats! The flavor is unique and light, creating a tasty dish your loves will ask for again!

Bring it to your next gathering as a healthy, lean addition to the table!

mango chicken napa salad pic 2.jpg

Ingredients:

  • 1/3 cup low sugar orange juice

  • 3 tablespoons rice vinegar

  • 3 tablespoons low sodium soy sauce

  • 1 tbsp sesame oil

  • One head napa cabbage, sliced thinly

  • 2 cups sugar snap peas, sliced thinly and diagonally

  • 2 cups shredded chicken or diced grilled chicken

  • 1 medium mango, sliced

  • One handful coarsely chopped fresh mint

  • One small bunch of green onions, sliced diagonally

  • 2 tablespoons toasted sesame seeds

Instructions:

To make the dressing: whisk together the juice, vinegar, soy sauce, sesame oil and half of the sesame seeds in a small bowl. Set aside.

mango chicken napa salad pic 8.jpg

To make the salad: thinly slice up the napa cabbage and peas, toss together with the chicken, mango, mint and green onions. About 30 minutes to an hour before serving, toss everything together and then refrigerate so that the marinade can flavor the salad ingredients. Sprinkle the rest of the sesame seeds over the recipe right before serving.

mango chicken napa salad pic 7.jpg

Tips:

For the chicken in this recipe, you can either use grilled chicken leftover from a previous meal, or shredded cooked chicken made easily in a slow cooker.

If you like a little heat, you can always add crushed red pepper into this recipe, or even a little bit of curry paste into the dressing.

To save even more time and effort, you can always replace the Napa cabbage and sugar peas with a pre-chopped cabbage salad mixture in a store-bought kit! Toss in shredded bits of a store-bought roasted chicken and voila! You're eating dinner - EASILY!

This recipe was found originally in the Eating Well magazine, and tweaked to be FRESH Start friendly...we'd love to hear what YOU think of it! 

How to Grill Chicken & Salmon

Grilling is one of the reasons I enjoy summer so much. The fact that I live in Arizona means I get to do more of it than just during the summer months too! Yep, I’m able to grill year ‘round here. Talk about a happy girl!

Have you discovered the benefit of grilling for a healthier dinner meal plan? SO easy, so light, so yummy!

Here's some specific ideas to help you make healthier (and yummier) salmon and chicken on the grill for your healthy dinners at home.

Tender & Savory Basic Grilled Salmon.jpg

How to Create Tender, Savory Salmon on the Grill

  • If salmon is frozen, thaw completely.

  • Pre-heat grill to medium-high heat, lay salmon filets out on flat pan or plate.

  • Squeeze 1 full lemon evenly over the salmon.

  • Sprinkle 3-4 garlic cloves, minced, over the fish.

  • Press the garlic into the flesh.

  • Sprinkle freshly cracked black pepper over salmon and salt lightly.

  • Sprinkle ground onion, ground garlic, paprika and a light shake of chili powder if you like a little more flavor.

  • Place salmon on light spritz of olive oil on aluminum foil packet on grill (if it has skin, you can place directly on grill plate - tastes better this way, in my opinion.

  • Your fillets are now ready to grill slowly over low heat, for about 15 minutes, or until done.

Additional Tip: Use fresh herbs, like dill, for extra flavor over salmon.

chicken and peppers cropped.jpg

Grilling Tips for Pull-Apart Chicken Breasts

  • Buy full boneless skinless breasts instead of tenderloins to save money.

  • Cut chicken breasts into 2-3 pieces (tenderloin-style) to promote quicker cooking and portion control.

  • Marinate breast pieces in a small amount of Italian salad dressing. I use Italian dressing because it’s a neutral flavor, keeps the chicken moist and from getting slimy/tasting weird as the week progresses.

Make Ahead Tips: Grill enough on Sunday for meals through Wednesday, then midweek, grill a new batch for the remainder of the week’s meals.

Cooking ahead like this cuts your prep time down and is a delicious grab and make option for those days you don’t want to be in the kitchen too long. 

Cooking for meals ahead of time will give you a quick protein choice for soups, salads, pastas, and sandwiches. It will be easier to stick with a healthier meal plan when you have these ready to grab and add, versus cooking them separately for each day’s meals.

Tenderness Tip:  Be sure to grill the chicken until JUST done (they’ll be white, NO pinkness), on medium heat.  If you grill them on high heat or too quickly, you’ll end up with tough meat!

Coaching tip: I've had people ask me about the "alleged" link between cooking on a grill and cancer. After researching this specific topic even further, I’ve found that so far, research has not concluded that grilling causes cancer. However, cooking foods too fast, at too high of a temperature and for too long can release carcinogenic compounds that contribute to some cancers.

So a good rule of thumb for safely grilling is:

Cook (and Grill) Low and Slow!

Healthy Turkey Quinoa Mini Meatloaves

Family dinners can be an exhausting process for the busy mom who is trying to please all the varied preferences and taste buds in her home! 

One of our greatest goals here at FRESH Start is providing the busiest mom and their pickiest eaters with more family-favorites – more TASTY, HEALTHY recipes to make her life easier!

My picky family of six loves this recipe – in fact, it’s a regular at our dinner table! 

mini meatloaves.jpg

It’s veggies, protein, healthy fats and whole grains all in one beautiful dish.

Makes a fabulous prep-ahead dish, too. 

Just make a few extra loaves ahead of time (I do this easily by doubling the batch I'm making for dinner) then, instead of cooking them, I freeze them ready to pop in the oven on the night in question. You can freeze them right in their mini-loaf pans, leaving no cleanup on the night you fix them! Plus you'll have a hearty, no-work dinner ready to go for one of your family's busiest nights.

Here's how to make them:

Ingredients

  • 1 lb or 1 package lean ground turkey (93/7)

  • 3/4 cup cooked quinoa

  • 1 egg

  • 1/4-1/2 cup sweet onion, finely diced

  • 3-4 baby bell (Portobello) mushrooms, finely diced

  • 2-3 garlic cloves, finely diced

  • 1/3 cup carrots, finely diced

  • 1 tsp dried thyme

  • 1/2 tsp cumin

  • Olive oil

  • 2-3 cheese sticks (mozzarella) cut in half or thirds

Topping sauce:

1/3 cup apple cider vinegar

1/3 cup low-sugar ketchup

1 Tbsp brown sugar or honey

Add 1 tsp of water at a time to get sauce to desired thickness. Stir all sauce ingredients together with a whisk until smoothly blended!

Instructions

  1. Preheat oven to 375 degrees, prepare 4-5 mini-meatloaf pans by spraying them with olive oil spray.

  2. Put a medium sauté pan over medium heat, add 1 tsp olive oil to pan. Add in the diced onion, mushroom, garlic cloves and carrots. Sauté for about 2-3 minutes, or until veggies are softened and smell savory.

  3. Add in the thyme and cumin. Salt and pepper to taste. Pull pan off stove, allow mixture to cool for a few minutes.

  4. Meanwhile, in a large bowl, mix together the ground turkey, quinoa, and egg. Once vegetable and spice mixture is cool, add that into meat mixture.

  5. Pat meat mixture into 4-6 small loaves, placing them into mini loaf pans. Put 1/2 of a cheese stick in the middle of each loaf, then form meat around cheese stick.

  6. Using your fingers, pat an indent into top of each loaf, and place 1-2 Tbsp of topping sauce into the well.

  7. Bake loaves at 375 degrees for about 20-25 minutes, uncovered, or until cooked through.

    Serve with baked sweet potatoes and a side salad or other green selection for a well-rounded dinner selection!


Flexible enough to make ahead of time, or right on-the-spot, this family favorite is sure to become a go-to at your place as well!  Super-healthy, and tasty to boot, you’ll be glad you added this one to your family recipe rolodex!

Let us know what you think of this recipe, we’d love to hear your family’s feedback!  

How to Make Crock Pot Shredded Chicken {BONUS Chicken Enchilada Recipe!}

This shredded chicken recipe is a great “protein base” recipe, so that you have moist, tasty shredded chicken on hand for entrees later in the weekly meal plan, like salads, tacos, enchiladas or even to add to soup.

Cook up a large batch, then shred and freeze or refrigerate in pre-portioned freezer bags ready to pull out and use later. Makes nightly cooking too easy, and everyone loves the rich, brothy taste of this chicken (even the picky eaters!)

The chicken is also ready to be additionally seasoned, for instance, use chili powder and garlic for a Mexican-flavored dish, or taco seasoning for a taco salad protein topper!

Crock Pot Shredded Chicken & Healthy Chicken Enchilada Recipe.jpg

Here’s how you make it.

Ingredients:

  • 2 pounds boneless, skinless chicken breasts

  • 1 can (or half box) low-sodium chicken broth

  • 1 bay leaf

  • 3 cloves garlic, smashed

  • 6-7 whole peppercorns

  • 1/2 cup cooking wine (white is best)

Instructions:

  1. Add all ingredients together into a crock pot, cook on low for 6-8 hours, or high for 3-4. Once chicken pulls apart easily, it is ready! Let chicken cool, remove from crockpot, and shred. You’ve got shredded chicken!

Here’s a quick & comforting recipe you can whip up using this easy crock pot shredded chicken: 

pic 3 for Crock Pot Shredded Chicken & Healthy Chicken Enchilada Recipe.jpg

Ingredients

  • 2 cups crock-pot shredded chicken (soaked in ¼ cup of enchilada sauce)

  • 1 dozen corn tortillas

  • 1 small can mild enchilada sauce

  • 8 ounces shredded cheese

  • Plain Greek yogurt (optional, as topping)

Instructions

  1. Preheat the oven to 375 degrees.

  2. Heat the enchilada sauce in a deep fry pan over low heat.

  3. Place corn tortillas, 2-3 at a time, into the saucepan and soak them until covered by sauce. Remove, lay flat on plate.

  4. Line one side of corn tortilla with small amount of chicken, sprinkle half handful of cheese, then roll and place into baking pan (9x9 size works if the enchiladas are rolled tight, 13x9 is better if you want them looser.)

  5. Once all enchiladas are rolled and placed together into pan, spread remaining enchilada sauce over the top, and sprinkle remaining cheese.

  6. Cover with aluminum foil and bake for 15-20 minutes. Then remove foil, put oven on broil (high) and bake for another 3-4 minutes. Watch it carefully as cheese may burn if left too long on broil.

  7. Remove finished enchiladas and enjoy with a side of rice and beans!

FRESH n’ Healthy Tip: Garnish with a dollop of plain Greek yogurt instead of sour cream – it’s a protein-rich & healthier fat option!

If you enjoyed these recipes, we think you might like these articles & recipes too:

Turkey Carrot Quinoa Meatballs

Napa Cabbage & Chicken Salad Recipe

Healthy Fried Chicken Tenders 

Turkey Quinoa Carrot Meatballs + Bonus Pantry Soup Recipe!

Around here, discovering a simpler way to get a healthy meal choice on the dinner table (and one that everyone likes) is ALWAYS a win!

and this turkey quinoa carrot meatballs recipe is another treasure...

Turkey Quinoa Carrot Meatball

I’ve added this easy meatball recipe to my "mom’s treasure box" of easy-to-make-ahead dinner ideas. 

Make a double batch of these meatballs, freeze or refrigerate the other half to use later, and when you’re in a pinch for a quick solution to a FRESH dinner main dish - voila!

If you've never used ground turkey before, I think you'll find the addition of carrots and quinoa to add some great texture, moisture and richness to this simple can't-be-ruined Turkey Meatballs recipe.

Ingredients

  • 1 lb ground lean (93/7) Turkey
  • 1/3 cup bread crumbs (I use gluten-free, but any will work)
  • 1/2 cup cooked quinoa
  • 1/3 cup finely diced carrot
  • 3 garlic cloves, minced finely
  • 1/3 cup finely diced sweet onion
  • 1 egg
  • 1/2 tsp onion powder
  • 1 tsp Italian seasoning

Instructions

  1. In a medium sauté pan over medium heat, drizzle olive oil. When oil is hot, add carrots and onions in and stir. Lower heat, and cook until carrots and onions are soft.
1-Turkey Quinoa Carrot Meatball.JPG

2. Add in minced garlic and cook 2 more minutes. Remove from heat and allow to cool to room temp.

2-Turkey Quinoa Carrot Meatball.JPG

3. Meanwhile, stir together lean ground Turkey, breadcrumbs, cooked quinoa, egg and seasonings. Stir in cooled cooked vegetables. 

3-Turkey Quinoa Carrot Meatball.JPG

 4. Form fully mixed meatball mixture into small meatballs (slightly smaller than golf ball-size)

4-Turkey Quinoa Carrot Meatball.JPG

5. Cook immediately OR store in fridge for up to 3 days or in freezer for up to several weeks!

These meatballs are great baked in a 400 degree oven for 15-20 minutes, crock-pot cooked, or steamed in a saute pan for 20 minutes. They can be served in our homemade sauce or served alone, alongside a great veggie side. They are awesome in soup too, and you can find an easy recipe below to use them in!

here’s a great recipe to use these meatballs in!  

This Pantry Meatball Soup is just one easy way to use these delicious and simple Turkey Quinoa Carrot Meatballs in a quick one-pot-dinner dish. Make this even faster by having the meatballs prepped and ready to cook in the fridge or freezer. Just pull them out, uncooked, and add them to the broth in this yummy one-pot-dinner soup! Use pre-made meatball mix and the whole recipe will be ready to eat in 20 minutes, tops!

I call this my “Pantry” soup because I usually ALWAYS have these ingredients on hand in the pantry (or something close enough to it as a substitute!) You’ll see that it’s just too fast and easy to prepare this!

Once you do, it’ll become a family favorite and you’ll be glad you always have these ingredients on hand.

Pantry Meatball Soup.JPG

Pantry Meatball Soup

Ingredients

  • 12-15 uncooked Turkey Quinoa Carrot Meatballs
  • 4-6 cups low-sodium chicken broth
  • 2 cups water
  • 2 cups selected “pantry” or assorted available veggies - I used leftover celery, carrots, onions and frozen green beans
  • 1/2 cup whole wheat or gluten-free elbow pasta
  • 1 tsp Italian seasoning
  • 2-3 mashed garlic cloves
  • Shake of pink or sea salt & cracked fresh black pepper

Instructions

1. Start broth, water, all seasonings and veggies together in a medium soup pot and bring to a soft bubble (uncovered) over medium-high heat.

2. Cook for about 5 minutes, then gently add in meatballs and cook for 8 minutes more.

3. Add in elbows and cook another 6-7 minutes.

4. Pull soup off heat and let settle for about 3-4 minutes, and serve.

Let me know what you think in the comments below! I'd love to hear how these recipes work for you.

Looking for a community of supportive people to share this healthy-living journey with?

We're finding that the accountability we're sharing is boosting the fresh-lifestyle success of our free community members in surprising ways. Would you like to be supported like this? Join our free online community and get it!

Easy Oven Kale Chips

Kale has returned to the scene as a popular green that is not only full of delicious flavor, but also as an extraordinary source of vitamins A, C and K. These three vitamins are at the top of the list of immune-boosting benefits to our bodies, so this easy-to-prepare green leafy vegetable is a great option for your family's table. 

kale done pic 1.jpg

Aside from its rich nutrient value, Kale is great at boosting your immunity, and health! Eating kale is proven to help cancer prevention, lower cholesterol, reduce the risk of heart disease, promoting compounds for eye health, and more. ALL good reasons to eat more kale!

There's only one disadvantage with eating Kale (besides that it disappears from the plate too quickly!) and that is it can interfere with your body's absorption of calcium. To help prevent this problem, avoid eating calcium-rich foods at the same time. 

Besides eating kale fresh in salads or smoothies or wilted on pasta dishes, these kale chips are a popular way to get enough greens into your family and your own body!

Our friend & healthy lifestyle leader Lolita McNeal shared this easy recipe with our FRESH Start Online Community as a wonderful way to get the satisfaction of a salty crunch into our diet when we are craving chips or other salty no-no's!

LOLITA’S EASY OVEN KALE CHIPS

Here's How To Make Them:

Ingredients:

  • 1-2 heads fresh kale (you can find it in the produce section of your grocery store)

  • 1-2 Tbsp extra virgin olive oil or coconut oil

  • 1/2 tsp salt

Instructions:

  1. Preheat oven to 375-400 degrees. Cut the greens into 2-inch sized pieces. Rub the kale with extra virgin olive oil, evenly coating both sides.

  2. Spread out the pieces evenly on 2 parchment lined baking sheets; season with salt and pepper.

  3. Bake, rotating and switching pans halfway through cooking, until crisp, about 8 minutes.

  4. Optional: Zest lemon over the hot chips.

kale prep pic 1.jpg
 

Lolita shares:

Lolita fitness.jpg


"From my experience, you need very little extra virgin olive oil, the cooking time was closer to 6 minutes than 8, and it's okay if you leave out the lemon zest.  Some other flavor suggestions included with the original recipe were:  bbq rub, sriacha [a type of hot sauce], ranch dip mix, and sesame seeds. 

My family's favorite were the ones I rubbed with a little bbq sauce. If you decide to try the bbq kale chips look for low sugar bbq sauce."


If this recipe was a hit with your family, let us know in the comments below!

Here at FRESH Start, our mission is to share simple steps to better health that the whole family can get on board with - and we want to know how we're doing! Drop a note below and let us know.

Spicy Thai Chicken Bowl

For an alternative to Thai take-out, try this fun recipe!

I discovered this delicious dish just the other night and since I made it that first time for my family, it has become a smash hit - we've had to have it two times since! I especially love serving the whole thing in one bowl.

Spicy Thai Chicken Bowl - original.JPG

I won't promise you it's one of my "easy ones" - it's not! Little more advanced and time-consuming, but worth every minute of effort! Mmmmm!

It’s easy to put together and yet all the nutritional elements are here - protein, veggies & simple and delicious noodles. Perfectly seasoned for those of us who take it easier on the heat, but easy to alter for those of you who may be a little more adventurous with the spice...

So, are you ready to try this FRESH new take on a Spicy Thai Chicken Bowl?

Ingredients

  • 4-6 skin-on, boneless Chicken Thighs
  • 6 ounces uncooked brown rice noodles
  • 1 1/2 cups sliced and chopped yellow squash (about 2 small squash sliced 1/2 inch thick and cut into quarters)
  • 1 cup sliced thinly baby Bok Choy (I use one bunch of 3-4 heads)
  • 1 Tbsp low-sodium soy sauce
  • key limes, quartered (to use to squeeze over dish)

Instructions

  1. Preheat oven to 425 degrees. Heat a large skillet over high heat and add a swirl of canola oil. Sprinkle the chicken thighs with salt and pepper. Carefully lay the thighs, skin down, into the hot oil and cook for 3 minutes or until skin begins to brown. Remove chicken, and place on a paper-towel lined plate to drain.
  2. Meanwhile, line a cookie pan with aluminum foil and place chicken, skin side down, on pan. Place pan in oven and bake for 4-5 minutes.
  3. Remove pan and using tongs, turn chicken skin up and place pan back in oven for 2-3 minutes (or until cooked through.) Remove chicken from baking pan immediately and place on a cutting board to set for about 10 minutes. Just before serving, slice into 1 inch pieces.
  4. While chicken is setting, make sauce (instructions below) in a blender and set aside in a dish. 
  5. Boil the water for the rice noodles in a medium saucepan. Cook according to package instructions (usually rice noodles are not boiled, but rather placed in boiling water and then allowed to set for a few minutes, and then drained in strainer once they’ve softened.)
  6. In the same large skillet over medium to high heat, add a Tbsp canola oil and swirl in pan. Add in chopped squash and baby Bok Choy and sauté for about 3 minutes or until crisp-tender. Drizzle the soy sauce over the veggies.
  7. Place a helping rice noodles, veggies and several strips of crispy chicken thigh into a bowl, then drizzle with blender sauce and squeeze lime over dish. 

To Make Sauce:

1/3 cup chicken stock

1/4 cup water

2 tsp fresh ginger (peeled)

3 garlic cloves

handful cilantro

Thai Chile pepper (fresh) – sliced open, stem & seeds removed (IF you like it spicier, add another 1/2 to whole pepper)

Instructions:

1. Take all ingredients and blend in a blender or food processor until completely blended and smooth.

2. Pour into a dish and set aside.

Let us know how you like this and our other FRESH recipes in the comments below! 

Homemade Mac n Cheese

Kids and picky eaters can be tricky to please from our home kitchens, and they don’t always get as excited about nutritious dinners as we moms do! This super-easy homemade mac n cheese side dish will please both mom and picky eaters, and you'll do it in only 15 minutes!

It happens to be a lot of grownup’s favorite side dish too. In our house, we enjoy this side with fish entrees, chicken fingers and meatloaf.  

homemade-mac-n-cheese-pic-1.jpg

How to make it:

Ingredients

  • 1/2 box whole wheat elbow or gluten-free elbow noodles

  • 1/2 cup unsweetened almond milk

  • 2 Tbsp butter

  • 1 T olive oil

  • 4-6 oz shredded cheese

Instructions

1. Saute the uncooked noodles in a drizzle of oil for about 2-3 minutes, stirring to avoid burning them. (This step is optional, and gives the noodles more of a "crispy" texture once cooked, rather than mushy.)

homemade-mac-n-cheese-pic-2.jpg

2. Boil the noodles in several cups of water in medium saucepan over medium heat until just done (takes about 8 minutes.)

3. Drain noodles in strainer, add them back into the saucepan.

homemade-mac-n-cheese-pic-4.jpg

4. Over low heat, stir in shredded cheese, almond milk, butter and olive oil.

5. Continue stirring until just melted, then remove from heat and serve immediately.

homemade-mac-n-cheese-pic-1.jpg

For those of you curious about the other dish pictured here with our Homemade Mac n Cheese recipe...it's Coach Bess's Salmon and Quinoa Patties. Just click here for that recipe!

NOTE: I use this brand of gluten-free noodles for our homemade mac n cheese - in case you were wondering and wanted to try them. They are NOT just "filler food" like so many other pasta options. They are full of nutrition, as you can see on the label! (The protein amount on the label is due to the quinoa used in this brand!)

Oh and they are affordable and easy to find at your regular grocers! 

macaroni pasta gluten free label.jpg

What do you think? Would you try this recipe at home? Let me know in the comments!

Orange Chutney Chicken Cutlets Recipe & How-To

With a fancy name like “Orange Chutney Chicken” one might mistakenly guess that this simple chicken cutlets recipe is too complicated or stressful to prepare.  

Be assured, it’s as easy as 1-2-3! 

For even quicker prep, prepare the cutlets ahead of time, or use a commercially baked chicken. This delicious dinner is a wonderful dish that the whole family will enjoy, and ask for again!

orange chutney chicken - 1.JPG

Here's how to make it:

Ingredients

  • 2 Tbsp olive oil
  • 2 Cloves garlic, thinly sliced
  • 1 Tbsp curry powder
  • 1/4 cup chutney (or same amount orange marmalade)
  • 1/4 cup orange juice
  • 1 orange, segmented
  • 8-12 boneless, skinless chicken cutlets, pre-baked plain or with panko coating in the oven at 375-400 degrees for 8-10 minutes
orange chutney chicken - 2.JPG

Instructions

1. Heat 2 Tbsp olive oil over medium heat in a medium skillet. Add the sliced garlic cloves and cook until golden brown, stirring occasionally.

2. Add the curry powder and cook, stirring for 30 seconds more.

3. Add in the chutney and orange juice, cooking until melted.

orange chutney chicken - 5.JPG

4. Gently stir in the segmented orange and remove from heat.

orange chutney chicken - 6.JPG

5. Serve the sauce drizzled over the chicken cutlets, over a bed of brown rice or pasta, or a FRESH Salad.

orange chutney chicken - 8.JPG

This dish is another piece of  proof that comfort-food dinners CAN BE made healthy! They are good-for-you and can be made over, just switching out a couple ingredients as items from the old favorites aren't always the best.

Follow along with us as we introduce many new dishes on this blog - to help you keep comfort food on your family’s dinner table! It’ll just be the nutritiously delicious kind!

Members of the FRESH Start Online Community get recipes, cooking tips, support & more!

Click here to join us, free!

Healthy Fried Chicken Tenders {Picky-Eater Approved!}

What mom isn't looking for the perfect “picky-eater-proof" recipe for a fresh and easy dinner?

Panko Chicken pic 4.JPG

This is the topic of discussion OFTEN in our {FREE} FRESH Start Club as we help each other find solutions daily! This recipe is a life-saver & so EASY - takes just a couple ingredients and only 20-30 minutes to prepare, start to finish.

This Healthy "Fried" Panko Chicken recipe can also be cooked ahead of time, refrigerated for up to a couple days, and reheated (or even served chopped cold!) for a great-tasting quick dinner solution the picky eaters in our lives will actually LOVE and eat!

Here's how to make Healthy Fried Chicken Tenders for your family!

Ingredients

  • 1 lb Boneless, Skinless Chicken Tenderloins (or handcut tenders)

  • 1 package (about 1.5 - 2 cups or so) of panko breadcrumbs

  • 1 tsp Italian seasoning

  • 1 cup unsweetened almond milk

  • salt and cracked pepper

  • olive oil

Instructions

1. Preheat oven to 400 degrees.

2. Line a baking sheet with foil.

3. Place the panko breadcrumbs in one shallow dish, stirring in the Italian seasoning, and pour the almond milk in another shallow dish.

Panko chicken pic 1.JPG

4. Set a medium fry pan on medium-high heat and thinly drizzle olive oil over the pan.

5. Once oil is heated, begin dredging the chicken tenders in the almond milk, then immediately in the breadcrumbs. Shake off any excess crumbs from the tenders, then place carefully in the hot pan.

Panko chicken pic 2.JPG

6. “Fry” the tenders for only 1-2 minutes per side, then place them on foil-lined baking pan.

7. Once all tenders are “fried” crispy (they won’t be cooked through, this step is to give them the “fried” taste only!) place the pan into the pre-heated oven.

8. Bake for about 6-8 minutes, or until cooked through. (Time will vary with difference in ovens.)

9. Once cooked, serve plain or with low-sugar or homemade dipping sauces, and alongside ANY veggie dish!

Nutrition Note: By using almond milk, we've eliminated dairy in this recipe. This healthy fried chicken recipe can EASILY be adapted to be gluten free as well by using gluten free crumbs.

Notes

*~*FRESH Prep Tip*~* This dish also works as a great protein center to pre-bake, then refrigerate and use later in the week over salads, in pasta dishes or served with creative and tasty sauce combinations, like in our Orange Chicken Chutney recipe OR our popular Spinach Chicken Parmesan recipe.

After you've added this recipe to your repertoire, let us know how you use it…as a piece of a delicious and simple meal, or served alongside tasty FRESH sides. We’d love to hear your ideas!

What do you think?

Does this healthy fried chicken recipe sound kid and picky-eater approved to you?

Remember, you can very easily make up a double batch and refrigerate this healthy version of fried chicken pieces for future dinners too. Batching cook or prep-cooking is one of the favorite tools of cook-at-home healthy-minded folks. 

In our FRESH Start Club, we share tips and strategies for getting through our super busy lives with our sanity intact WHILE ALSO meeting our healthy-living goals. There is a big difference between struggling alone and having a winning team on your side!

Join our growing, vibrant, encouraging exclusive and FREE group today!